Showing posts with label Girls Hair Tutorial. Show all posts

Friday, December 21, 2012

Pretty Toddler Ballet Buns

All the little girls at my daughter's most recent holiday Nutcracker ballet performance were using (or rather, their mom's were using) these bun donuts to make the most beautiful, shiny, full buns, even on fine or short toddler hair. 

the tool looks like this, which you can purchase from amazon or most beauty supply stores: (you can also make your own by cutting out the toe area from a sock and rolling it to form the donut.)


So here is how to make the perfect ballet bun, using the bun form above:
Tutorial via Princess hairstyles. Pink flower image via princesspiggies

Wednesday, October 3, 2012

Halloween Hair for Girls: Part 2

Disneyland's Studio 365 (Store in Downtown Disney in California) does makeovers on little girls hair that has more variety than the Princess Hairstyles at Bibbidi Bobbidi Boutique (Located inside Disneyland, which mostly does sleek buns with tiaras). The 365 hairstyle menu usually involves cornrows/twists, then add colorful clip in extensions and glitter. These are perfect for my daughter, who wants to be a rockstar/pop star for Halloween. Also works for pirates, princesses, fairies, and any costume you want to style up a little!

This is the new Pirate 'do, with a crown french braid into a bun, along with pink and purple hair extensions:

 Here is the step-by-step on one gal's hairdo:


Below, these colorful bow hairstyles using clip-in extensions (sold and used at Studio 365) could be done for a variety of Princess, Fairy or rockstar Halloween costumes. To see a step-by-step for this little one's Studio Disney 365 hairstyle, click here.


Tuesday, October 2, 2012

Girls Dancewear and Dance Hair

Here is some cute hair inspiration for dance and gymnastics class from ivivva athletica. If you haven't checked out their stylish line of active girls apparel by parent company lululemon athletica, you will love it. My daughter loves the details, like thumbholes on the long sleeve shirts, super-soft leotards and unitards in unique designs, and tops that double as school and dance class outfits!
 
the pony-braid: the perfect hairstyle to snazz up your jazz routine:
You’ll need 2 elastics and a friend to create this hairstyle.
  1. Gather your hair at the top of your head in a high ponytail, and tie it with an elastic.
  2. Ask your friend to braid your ponytail, and fasten it with the second hair elastic.
  3. Finish the look with a bright, fun headband and then head to class!
 the messy bun: pop & lock in hip-hop with this ‘do:
 You’ll need 1 hair elastic for this style.
  1. Flip your head upside down and gather your hair into a ponytail at the top of your head.
  2. Wrap an elastic around your pony tail once, and pull through only some of your hair, leaving the rest loose.
  3. Wrap the elastic around for a second time, catching more hair. If you can wrap the elastic a third time, catch the remaining hair into a tight bun. It should feel nice and snug!
  4. Take a peek in the mirror and see how the bun looks. Pull some more hair out of the bun to make it extra messy looking!
  5. Pick your favourite headband to complete the style, and to keep any wispy hair out of your face.
the braid & twist: stay en pointe in ballet with this chic style:
You’ll need 3 elastics, and a friend to help you with this style!
  1. Start by gathering your hair at the top of your head in a ponytail, and tie it with an elastic.
  2. Ask your friend you braid your ponytail right down to the tip, and then finish the braid with another elastic.
  3. Take your braided ponytail and twist it around the first hair elastic you put in your hair.
  4. Finally, take your third elastic and tie it around the braided bun you’ve created.
  5. Add your headband and  voila!
Other dancewear and dance class hair inspiration from ivivva athletica (which now has 5 stores open in the U.S. and ivivva.com always ships for free.):
Zipper-Pull doubles as an emergency ponytail holder!


all images via Ivivva athletica

Wednesday, September 26, 2012

Hair Tutorial: Classic Wave Hairstyle For Girls

This is a special occasion style that anyone can achieve. It will suit nearly any wedding theme and leaves room for accessories such as flowers and headbands. Our celebrity stylist Kota dressed this look two ways to create different looks for classic and romantic weddings Read this entry to see how you can create this hairstyle for girls at home.

Step one:
Brush hair out to match natural part, our mini-model Tinkerbell’s hair naturally falls into a side part. For this look we are trying to create a more defined curl, so use a smaller barrel and use smaller sections than you would for our Romantic Braid look. Spray each section lightly with hairspray before applying the tong. Hold each curl in the tong for about 10 seconds, don’t leave it too long you don’t want to burn the hair.
Step two:
For this style you don’t want to lift the hair at all, so leave the roots flat. This means leaving 2-3 inches at the root of the hair out of the tong. Flatten out any bumps left from pony tails with a cool blow dry and a barrel brush before you start working on that section of hair. 
Step Three: When you have completed the curls rub hairspray onto your hands and pull your fingers through the curls pulling hand down and away from the head. Finish the top with hairspray and use a soft bristle brush to smooth the hair behind the ears.

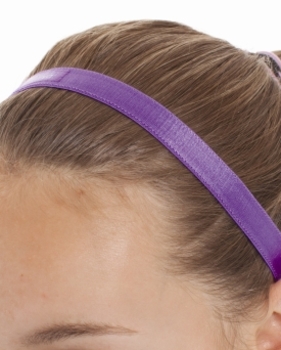
Accessorizing this look
This is the perfect style to finish with a sweet Alice band.
Flowers from the florist can be requested with a wire or clip fastening attached. Remove outer petals to make larger blooms more suitable for little faces. We just used bobby pins for to create this improvised floral look.
For a half-up floral style
Pull a section free from either side of the face, twist and gather the two sections and the back and pin low on the head, pin so as to maintain the shape of the twist. Cut the rose a short stem and slot into the back of the twist sliding it in on an angle, push it low so it nestles inside the hair.

Sunday, September 23, 2012

Braid Hairstyle for Little Girls


Hair Tutorial: Romantic Braid Hairstyle For Girls


This romantic hairstyle is perfect for a whimsical outdoor wedding. This look pulls out all the lovely tones and highlights in this little one's naturally golden locks. The tonged sections bring out the luminosity in her hair when caught by the light. 


Step one
For this look let the hair fall into a natural centre parting. Celebrity stylist Kota explains how centre partings tend to suit girlish styles whereas side partings give an instantly more mature feel. Always start by tonged styles by brushing the hair out with a soft bristle Mason and Pearson brush. Work out stubborn knots at the end of strands by gently working at them with a fine toothed comb.
Step two
To begin tonging, twist and pin the top section of hair using a sectioning comb. Each section should match the width of the tong. Twist before tonging each section to produce a looser and more natural curl, leaving the end free. Work your way through four layers of hair from bottom layer through to the top layer using the sectioning clip.
Step three
Lightly brush out the curls to make them look softer and more natural. Backcomb the crown of the hair, this will give the style volume and allow it to hold for longer. Height gives this hairstyle the ‘extra special’ quality for a more formal wedding occasion. Use the brush to backcomb over these sections.
Step four
Just above the ears start French braiding by pulling sections from the front and the top of the head finishing just beyond the half-way point secure with an elastic band. Repeat this on the other side of the head, keep the braid loose and deconstructed. When the two braids meet fasten with the elastic. Hide the band with a section of hair and fasten with a bobby pin.
Step 5
Pull some sections from the front free to frame the face. Don’t spray hairspray directly onto sensitive little faces when styling at the front, rub hairspray onto fingers and work it in with your hands.
Step 6 – Finishing touches
You can personalize look by gently loosening the braid all around the head. This gives a more natural feel and would look lovely finished with a fine gold clip or piece of lace.
tutorial via TheirLittleWorld

Wednesday, August 22, 2012

A Surprise Twist


Measured by the Heart posted this super easy tutorial 
(see the easy bun for a refresher on that if you need it)

Popular Posts